
Most options traders don’t blow up because they guessed the market wrong. They blow up because they chose the wrong option.
Same stock. Same direction. Same expiration. Completely different outcome — and the only difference was whether the trade was ITM, ATM, or OTM.
That’s the part almost no one teaches properly.
Moneyness sounds like basic terminology, but it quietly controls everything that actually matters in an options trade: how much you pay, how fast time works against you, how sensitive your position is to volatility, and how forgiving the trade will be when the market hesitates, chops, or pulls back.
It’s also why:
- “Cheap” options so often expire worthless
- Correct predictions still lose money
- Some trades feel smooth while others feel untradeable
If you’ve ever said, “The stock moved the way I thought it would — why didn’t I make money?” this is the missing piece.
In this guide, we’ll break down ITM vs ATM vs OTM options using clear explanations and payoff charts so you can see how each behaves — and more importantly, know exactly when each one actually makes sense.
Once this clicks, strike selection will never feel random again.
What ITM, ATM, and OTM Actually Mean (Plain English)
At the most basic level, moneyness describes where an option’s strike price sits relative to the stock’s current price.
That sounds simple — but the implications are anything but.
Moneyness determines whether an option already has value, is purely a bet on movement, or needs a significant move just to become relevant. It also influences how the option responds to time decay, volatility, and price changes the moment you enter the trade.
Let’s break it down without the jargon.
For Call Options
Call options give you the right to buy stock at a fixed price (the strike).
- In-The-Money (ITM):
The strike price is below the current stock price
→ The option already has intrinsic value - At-The-Money (ATM):
The strike price is very close to the stock price
→ The option is balanced between winning and losing - Out-Of-The-Money (OTM):
The strike price is above the stock price
→ The option only has value if the stock moves up
For Put Options
Put options give you the right to sell stock at a fixed price.
- In-The-Money (ITM):
The strike price is above the current stock price
→ The option already has intrinsic value - At-The-Money (ATM):
The strike price is very close to the stock price
→ The option is sensitive to even small moves - Out-Of-The-Money (OTM):
The strike price is below the current stock price
→ The option needs a drop to become valuable
The Part Most Traders Miss
Here’s the key insight most explanations skip:
- ITM options are already “working” when you buy them
- ATM options need movement soon
- OTM options need both movement and timing
In other words, moneyness quietly defines:
- How forgiving the trade is
- How much patience you’re allowed
- How wrong you can be and still survive
Once you understand that, ITM, ATM, and OTM stop being labels — and start becoming deliberate trade decisions.
ITM Options: The “Boring” Choice That Pros Respect

In-the-money (ITM) options don’t get much hype — and that’s exactly why professionals lean on them.
ITM options already have intrinsic value, meaning part of what you pay is real, immediate value tied directly to the stock price. You’re not just buying hope. You’re buying exposure that’s already working.
This changes the entire feel of the trade.
Why ITM Options Behave Differently
When you buy an ITM option, a larger portion of the premium is tied to delta, not time or volatility. That makes the position more predictable.
Here’s what that looks like in practice:
- Higher delta: The option moves more closely with the stock
- Slower time decay: Theta has less power over the position
- Lower volatility dependence: You’re less exposed to IV crush
- Higher upfront cost: You pay more, but you get stability
ITM options don’t need fireworks. A modest, steady move can still produce results.
Why Experienced Traders Prefer ITM Options
Professional traders care less about lottery payouts and more about repeatable outcomes.
ITM options support that mindset because they:
- Reduce the need for perfect timing
- Smooth out P&L swings
- Allow traders to stay in trades longer without panic
- Behave more like stock, but with defined risk
In many cases, ITM calls are used as stock replacement trades — offering directional exposure with less capital than buying shares outright.
Common ITM Use Cases
ITM options shine in environments where probability matters more than leverage.
Typical scenarios include:
- Directional swing trades
- Trend-following strategies
- Lower-volatility markets
- Conservative portfolio exposure
They’re especially effective when the thesis is “the stock will move, but not explosively.”
The Tradeoff You Need to Accept
ITM options won’t deliver eye-popping percentage returns.
- You’ll see fewer 200%–300% wins
- Capital requirements are higher
- Gains are steadier, not spectacular
But in return, you get something far more valuable: forgiveness.
ITM options give you room to be early, slightly wrong, or temporarily uncomfortable — without the trade immediately collapsing. And in the long run, that forgiveness is exactly why seasoned traders keep choosing the “boring” option.
ATM Options: Where Volatility Lives

At-the-money (ATM) options sit right on the fault line between profit and loss. They have no intrinsic value. Every dollar you pay is a bet on future movement — specifically, how fast and how far the stock moves before time runs out.
That makes ATM options the purest expression of volatility in the options market.
Why Traders Are Drawn to ATM Options
ATM options respond aggressively when something actually happens. That’s why they’re the weapon of choice for event-driven traders.
They offer:
- Balanced delta: Enough sensitivity to move quickly
- Maximum vega exposure: Volatility changes matter most here
- Explosive P&L potential: When price moves decisively
- Symmetry: Calls and puts are priced similarly at the strike
This makes ATM options ideal for situations where traders expect movement, not direction alone.
When ATM Options Make Sense
ATM options perform best when the market is about to decide something.
Common use cases include:
- Earnings announcements
- Economic data releases
- Breakout setups from tight ranges
- News-driven momentum trades
In these environments, speed matters more than precision.
The Risk Most Traders Underestimate
ATM options are extremely time-sensitive.
If the stock:
- Stalls
- Moves slowly
- Pulls back temporarily
…theta decay accelerates quickly.
Many traders confuse being “early” with being “right,” but ATM options don’t care. If the move doesn’t happen soon enough, the position bleeds value even if the thesis is eventually correct.
The ATM Tradeoff
ATM options demand discipline.
- Entry timing must be tight
- Exits must be decisive
- Hope is punished
When used correctly, ATM options can deliver clean, powerful trades. When used casually, they quietly drain accounts. That’s why experienced traders treat ATM options with respect — not excitement.
OTM Options: Cheap for a Reason

Out-of-the-money (OTM) options are where most new traders start — and where many accounts quietly bleed out. They look attractive because they’re inexpensive. You can control 100 shares of stock for a fraction of the cost of ITM or ATM options. The upside feels massive. The risk feels limited.
But the market prices OTM options cheaply for one simple reason: they usually don’t work.
Why OTM Options Are So Tempting
OTM options trigger the same psychological pull as long shots.
They offer:
- Low upfront cost
- High percentage return potential
- Defined maximum loss
- A feeling of “not risking much”
On paper, it looks like the perfect setup.
What the Price Is Telling You
An OTM option has no intrinsic value and low delta. That means the market believes the probability of finishing in-the-money is small.
Here’s what you’re really buying:
- Time that’s working against you
- A narrow window for the move to happen
- Sensitivity to both price and timing
Even if the stock moves in the right direction, it often isn’t enough — or doesn’t happen fast enough — to overcome decay.
When OTM Options Actually Make Sense
OTM options aren’t useless. They just need structure.
They work best when:
- Used inside defined-risk spreads
- Paired with high-conviction setups
- Traded with short holding periods
- Sized small enough to absorb frequent losses
In professional hands, OTM options are tools — not bets.
The Hard Truth
Most OTM options expire worthless. That’s not bad luck. That’s math.
If you treat OTM options like lottery tickets, they’ll behave like lottery tickets. If you treat them like precision instruments, they can be powerful.
The difference isn’t the option — it’s the trader.
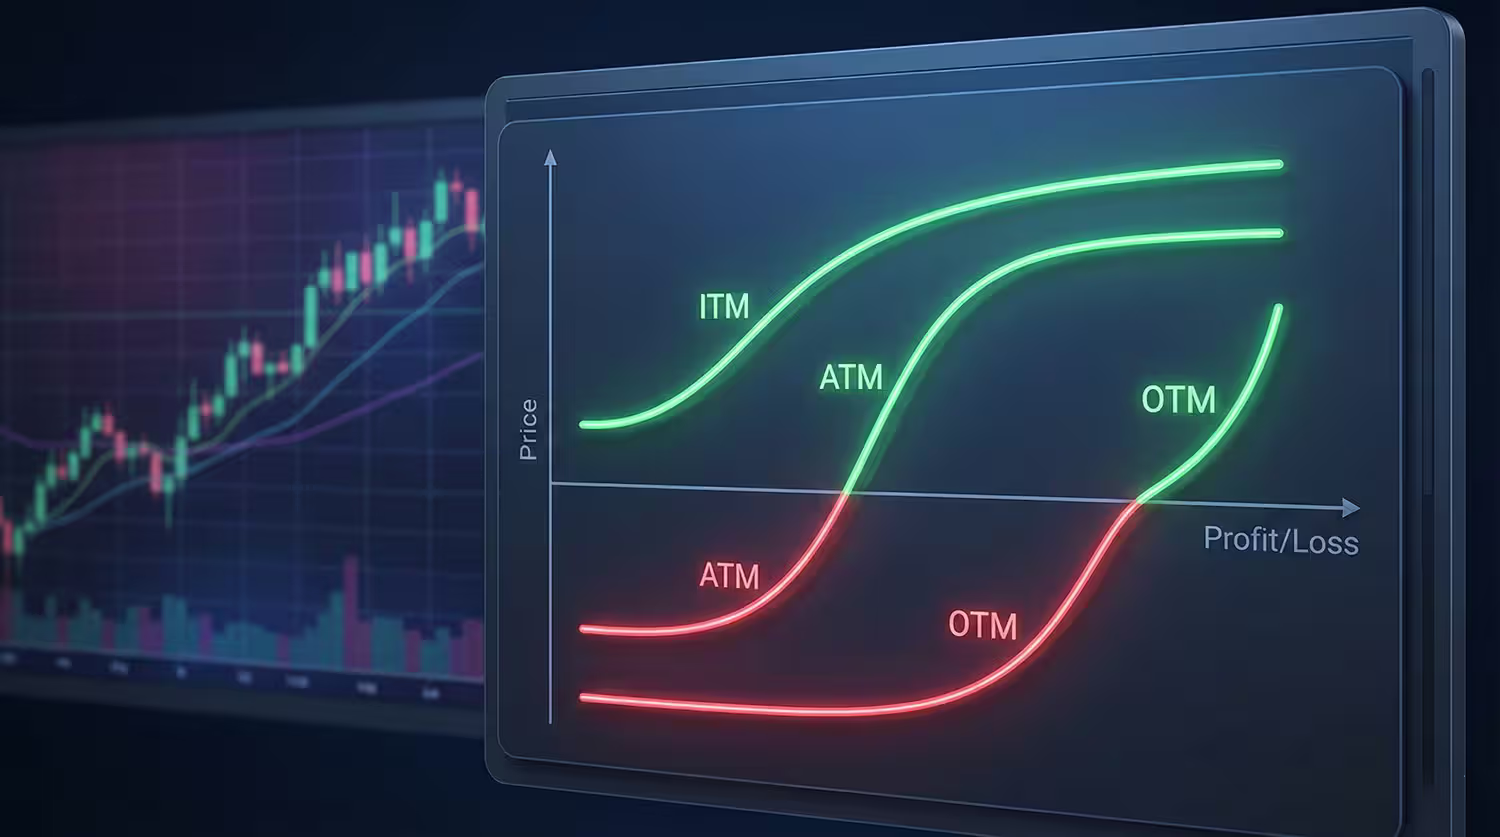
ITM vs ATM vs OTM Payoff Charts (This Is Where It Finally Clicks)
You can read definitions all day. You can memorize Greeks. But payoff charts are where options finally stop being abstract.
A payoff chart strips away opinions and shows you one thing only: what your option is worth at expiration at every possible stock price.
And when you compare ITM, ATM, and OTM side by side, the truth becomes obvious fast.
Interactive Options Payoff Chart
Option Type
CallPut
Moneyness Presets
ITMATMOTM
Stock Price
Strike
Premium
Price at Expiration: 100
What You’re Looking At (Quick Orientation)
Every payoff chart answers the same questions:
- Where is maximum loss?
- Where does the trade break even?
- How far does the stock need to move before profits appear?
- How steep is the profit curve once it starts working?
The shape of that curve tells you more than the option price ever will.
ITM Payoff Shape: Forgiveness Built In
ITM options start closer to breakeven because part of their value is already real.
Key characteristics:
- Smaller distance to breakeven
- Smoother, more linear payoff curve
- Profits begin earlier
- Losses grow more slowly
This is why ITM options feel calmer. The chart reflects a trade that doesn’t need perfection.
ATM Payoff Shape: Precision Required
ATM options sit right at the tipping point.
What the chart shows:
- Breakeven is further away than ITM
- Profit curve is steep but narrow
- Small moves don’t help much
- Big moves help fast
ATM options reward decisive movement. Anything less and the chart turns against you quickly.
OTM Payoff Shape: Asymmetry at a Cost
OTM options have the most dramatic payoff curves — and the most brutal failure rate.
The chart reveals:
- Breakeven is far from current price
- Most outcomes equal max loss
- Profits only appear after large moves
- Timing matters as much as direction
That “cheap” premium comes with a very clear condition: the stock must move fast and far.
The Most Important Insight the Chart Reveals
Here’s what payoff charts quietly teach that most traders never internalize:
- Cheaper options require more things to go right
- Expensive options require less perfection
- Risk is not the premium — it’s the distance to breakeven
Once you start evaluating trades by payoff shape instead of price, your option selection changes immediately. You stop asking, “How cheap is this option?” And start asking, “How forgiving is this trade?”
That shift alone eliminates a huge percentage of bad trades before they’re ever placed.
How Moneyness Changes the Greeks (Without the Headache)

You don’t need to memorize Greek formulas to trade options well. But you do need to understand which Greek is actually in control of your trade — and that depends almost entirely on moneyness.
ITM, ATM, and OTM options experience the Greeks very differently. If you ignore that, the trade can behave in ways that feel confusing or unfair.
Let’s simplify it.
Delta: How Much Your Option Moves
Delta measures how much an option’s price changes when the stock moves $1.
Here’s how moneyness affects it:
- ITM options:
High delta → behave more like stock
Small stock moves show up immediately - ATM options:
Medium delta → accelerates with momentum
Delta increases rapidly if the move starts - OTM options:
Low delta → needs a push
Small moves barely register
Practical takeaway: If you want immediate feedback from price movement, ITM options deliver. OTM options need confirmation.
Theta: How Time Decay Really Feels
Theta measures how much value an option loses each day.
This is where moneyness hits hardest.
- ITM options:
Slow decay
Time hurts less - ATM options:
Fastest decay
Every day matters - OTM options:
Constant decay
Bleeding even without movement
Many traders don’t realize ATM options lose value the fastest — not OTM. That’s why “nothing happening” is deadly for ATM trades.
Vega: Sensitivity to Volatility
Vega measures how much an option’s price changes when implied volatility shifts.
- ATM options: Maximum sensitivity
- ITM options: Lower impact
- OTM options: Lower impact
This is why volatility crush after earnings hits ATM options the hardest — even if price moves.
The Big Picture (What Actually Matters)
Here’s the shortcut experienced traders use:
- ITM = Delta-driven trades
- ATM = Volatility + timing trades
- OTM = Probability-driven trades
You don’t need to manage every Greek. You need to manage the one that dominates your position.
Once you align moneyness with the Greek you actually want working for you, options stop feeling unpredictable — and start behaving exactly the way you expect.
Which One Should You Trade? A Simple Framework

There is no “best” moneyness. There is only the option that fits what you’re trying to accomplish.
Most traders get this backward. They pick a strike because it’s cheap, popular, or emotionally comfortable — and then wonder why the trade behaves differently than expected.
Instead, start with the goal. Then choose the moneyness that naturally supports it.
Step 1: Define the Job of the Trade
Before choosing a strike, answer one question:
What needs to happen for this trade to work?
- A steady move over time?
- A fast breakout?
- A volatility expansion?
- A low-stress directional position?
Your answer narrows the field immediately.
Step 2: Match Moneyness to Your Objective
Choose ITM Options If You Want:
- Higher probability of profit
- Immediate responsiveness to price movement
- Slower time decay
- Less reliance on volatility
Best for: Directional swing trades, trend continuation, stock replacement strategies.
Choose ATM Options If You Want:
- Maximum exposure to volatility
- Strong payoff from fast moves
- Balanced call/put pricing
- Event-driven opportunities
Best for: Earnings plays, breakouts, macro events, short-term momentum.
Choose OTM Options If You Want:
- Defined risk with small capital
- Asymmetric payoff potential
- Strategic leverage
Best for: Spreads, speculative momentum trades, tightly risk-managed bets.
Step 3: Check the Forgiveness Factor
Ask yourself honestly:
- Can this trade be early?
- Can it chop?
- Can it pull back before working?
If the answer is no, OTM and ATM options may not survive.
If the answer is yes, ITM options often shine.
Step 4: Align With Your Personality
Your temperament matters more than your thesis.
- Hate watching decay? → ITM
- Love trading catalysts? → ATM
- Comfortable losing small often? → OTM
The right moneyness should reduce stress — not amplify it.
The Core Rule Professionals Follow
Don’t ask which option is cheaper. Ask which option is more forgiving. Forgiveness is what keeps you in the game long enough to compound skill and capital.
When strike selection aligns with intent, options trading stops feeling chaotic — and starts feeling deliberate.
Common ITM / ATM / OTM Mistakes That Blow Up Accounts
Most blown accounts don’t come from one catastrophic trade. They come from repeatable mistakes tied directly to poor strike selection.
These errors feel small in isolation. Over time, they quietly compound until the account can’t recover.
Mistake #1: Buying OTM Options Just Because They’re Cheap
This is the most common trap.
Traders see a low premium and assume:
- “I’m not risking much”
- “If this hits, it’ll pay huge”
- “I can buy more contracts”
What they’re ignoring:
- Low probability
- Large distance to breakeven
- Fast decay
Cheap options require more things to go right, not fewer.
Mistake #2: Treating ATM Options Like Long-Term Positions
ATM options are not built for patience.
Holding them too long exposes you to:
- Rapid theta decay
- Volatility contraction
- P&L erosion even when price behaves
Many traders are directionally correct — just too early. ATM options punish early entries brutally.
Mistake #3: Using ITM Options Without Respecting Capital Efficiency
ITM options feel safer — and they are.
But traders sometimes:
- Oversize positions
- Ignore opportunity cost
- Forget they’re tying up more capital
ITM options still need risk management. Paying more for probability doesn’t mean risk disappears.
Mistake #4: Ignoring Implied Volatility Context
Moneyness and volatility are inseparable.
Common IV mistakes include:
- Buying ATM options before earnings without understanding IV crush
- Buying OTM options in already-inflated IV environments
- Assuming price movement alone guarantees profit
Volatility can erase gains faster than price can create them.
Mistake #5: Choosing Strikes Emotionally Instead of Structurally
Many traders pick strikes based on:
- “What feels exciting”
- “What others are trading”
- “What looks impressive on a P&L screenshot”
Professionals pick strikes based on:
- Distance to breakeven
- Forgiveness
- Probability-weighted outcomes
Emotion leads to inconsistency. Structure leads to survival.
The Pattern Behind Every Blow-Up
When traders review losing streaks, the issue is rarely market direction.
It’s usually one of these:
- Too much reliance on OTM options
- Poor timing with ATM options
- Misuse of ITM options without discipline
Fix strike selection, and many other problems disappear automatically. That’s not theory. That’s experience talking.
Real-World Examples (One of Each)
To really understand moneyness, you need to see it in action. Let’s walk through three trades on the same stock, with the same expiration, and the same directional idea — but using ITM, ATM, and OTM options.
The only thing that changes is strike selection.
Example 1: ITM Call – Stock Replacement
Scenario: A large-cap stock is trading at $100. You expect a steady push higher over the next few weeks, not a breakout.
Trade Setup:
- Buy the $95 ITM call
- Expiration: 30–45 days out
Why This Works:
- The option already has intrinsic value
- Delta is high, so price movement shows up immediately
- Time decay is slow
Outcome: If the stock moves to $104:
- The option gains steadily
- Minor pullbacks don’t destroy the trade
- You’re not forced to exit early
This trade behaves like owning stock — but with defined risk and less capital.
Example 2: ATM Straddle – Volatility Play
Scenario: The same stock is approaching earnings. You expect a big move, but direction is uncertain.
Trade Setup:
- Buy the $100 call and $100 put
- Same expiration
Why This Works:
- Maximum vega exposure
- Strong payoff if price moves decisively
- Direction doesn’t matter
Outcome: If the stock jumps to $108 or drops to $92:
- One side explodes in value
- The losing side decays quickly
- Net profit comes from speed and magnitude
If the stock barely moves? The trade fails fast.
Example 3: OTM Call Spread – Defined Risk Bet
Scenario: You still believe the stock can push higher — but want controlled risk.
Trade Setup:
- Buy the $105 call
- Sell the $110 call
- Same expiration
Why This Works:
- Lower cost than naked OTM calls
- Risk is capped
- Probability improves via structure
Outcome: If the stock rallies into the $106–$109 range:
- The spread gains value
- Loss is limited if the move stalls
- You avoid total premium wipeout
This is OTM moneyness used strategically, not emotionally.
The Key Lesson From These Examples
Same thesis. Same market.
Completely different behavior.
- ITM absorbs hesitation
- ATM demands speed
- OTM requires precision
Once you start viewing trades through this lens, you stop blaming the market — and start controlling outcomes at the strike level.
That’s when options trading begins to feel intentional instead of reactive.
The Cheat Sheet (Bookmark This)
If you strip everything in this guide down to what actually matters, it comes down to behavior.
ITM, ATM, and OTM options don’t just differ in price — they differ in how they act once you’re in the trade. This cheat sheet gives you a one-glance way to choose the right tool without overthinking it.
ITM Options (In-The-Money)
Best when you want probability and control.
- Higher upfront cost
- Higher delta (moves like stock)
- Slower time decay
- Less reliance on volatility
- More forgiving if you’re early or slightly wrong
Use ITM when:
- You’re trading direction, not excitement
- You want smoother P&L swings
- You can’t babysit the trade constantly
ATM Options (At-The-Money)
Best when you expect immediate movement.
- Balanced delta
- Maximum vega exposure
- Fastest theta decay
- Sensitive to timing
Use ATM when:
- You’re trading earnings or catalysts
- You expect a breakout soon
- You’re actively managing the trade
OTM Options (Out-Of-The-Money)
Best when structure matters more than probability.
- Lowest cost
- Lowest delta
- Highest leverage
- Most expire worthless
Use OTM when:
- You’re using defined-risk spreads
- You accept frequent small losses
- You’re targeting asymmetric payoffs
One-Sentence Rule for Each
- ITM: “I want this trade to work even if it’s messy.”
- ATM: “I need movement — and I need it soon.”
- OTM: “I’m risking little for a specific outcome.”
Final Shortcut Professionals Use
Don’t choose strikes by price. Choose them by forgiveness.
The option that forgives mistakes is the one that keeps you trading long enough to improve.
Final Thoughts: Moneyness Is the Edge Hiding in Plain Sight
Most traders spend their energy trying to predict the market. Professionals spend their energy designing trades that survive reality.
ITM, ATM, and OTM options aren’t just labels you memorize for a test. They are risk profiles. They define how much patience a trade allows, how wrong you can be before you’re punished, and how emotionally stable you’ll be while the position is open.
That’s why two traders can have the same idea, the same timing, and the same expiration — yet walk away with completely different results. One built a forgiving structure. The other built a fragile one.
Once you start choosing moneyness deliberately, a few things change fast:
- You stop overpaying for “cheap” options
- You understand why good ideas sometimes fail
- You gain control over risk before you enter the trade
Direction still matters. Timing still matters. But moneyness decides whether your trade gives you room to be human.
And in options trading, forgiveness is often the difference between surviving long enough to improve — and blowing up before you ever get the chance.