
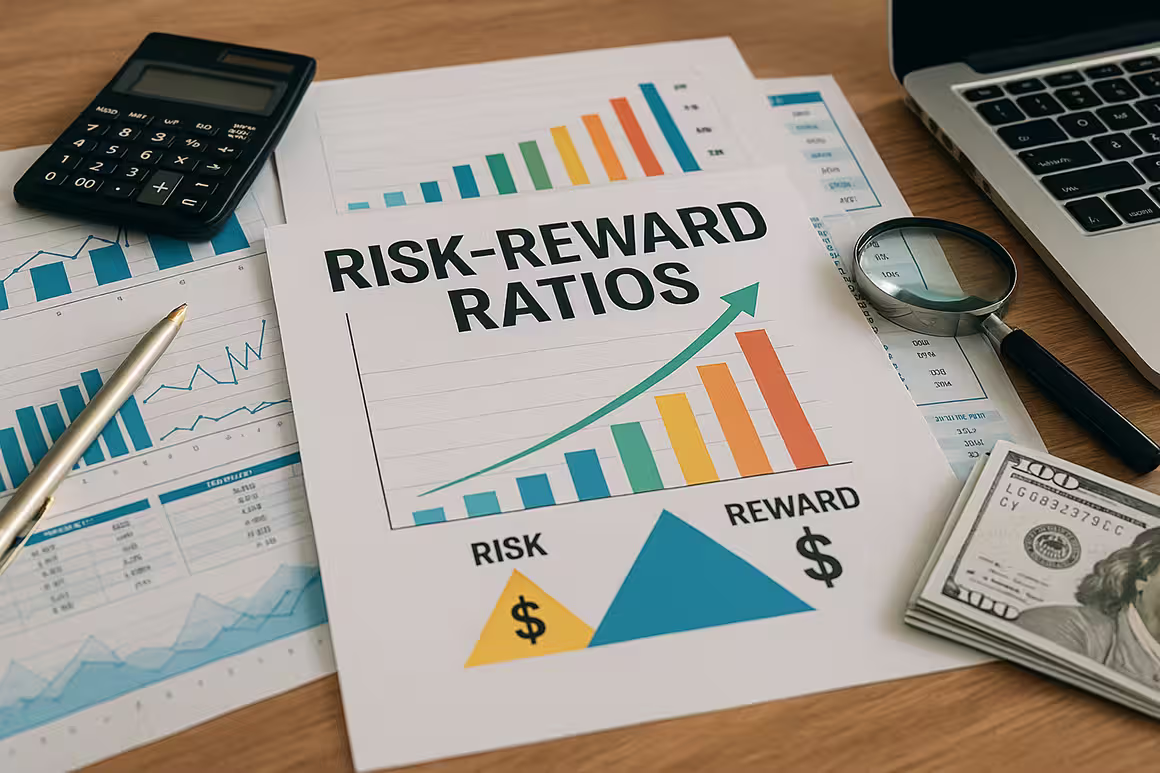
At the heart of being a successful options trader is a little thing that’s called risk and reward. Ok, so it’s not such a little thing.
And as options traders, we are constantly juggling possible profits against possible losses. But there are some important and easy-to-grasp risk-reward ratios and metrics that help people evaluate trades and overall performance in a structured and simple way!
Do you know if you’re maximizing your profits and managing your risks in an effective way? You can find out by reading the eight important risk-reward ratios! We’ll explain what each one means and why it matters for options trading. When you know what they are, you’ll be able to make the best decisions for your trading game!
The Importance of Risk-Reward Ratios
You’re a trader, right? Then you know that even the best strategies and profitable trades can lose money if the losses outweigh the wins. This is why risk-reward ratios matter so much – they quantify the relationship between how much you stand to gain versus how much you could lose on any given trade. In simple terms, a risk-reward ratio compares the potential profit of a trade to its potential loss. For example, risking $100 to potentially make $300 yields a 1:3 risk-reward ratio (one unit of risk for three units of reward). Traders often use such ratios to decide if a trade is worth taking. A favorable ratio (like 1:3 or higher) means the reward outweighs the risk, while an unfavorable one (say 1:1 or worse) might not justify the trade.
Ignoring risk-reward ratios is a common mistake that can undermine long-term success. A “bad” risk-reward setup can lead to more losses than profits over time. For instance, some beginners focus only on picking winners and neglect the size of losses – they might win 70% of their trades but still end up in the red because one big loss wipes out many small gains. We need to remember that consistent profitability comes from both a decent win rate and solid risk-reward management. In other words, how we win is just as important as how often we win. By paying attention to risk-reward ratios on every trade, we make sure that the math is always on our side. You want to stack the odds in your favor: over lots of trades, good ratios will make sure that your profits outweigh losses.
1- Breakeven Ratio
Pretty much all traders want to know the answer to one thing: what percentage of their trades need to win so they don’t lose money? The breakeven ratio answers that question. It’s basically the win rate that’s needed to cover your losses, given your average risk-reward per trade. The ratio links your win rate and payoff. If you tend to make as much on your winners as you lose on your losers (a 1:1 risk-reward scenario), your breakeven win rate is about 50%. If your winners are bigger (like you risk $1 to make $2, a 1:2 ratio), your breakeven win rate drops to ~33%, meaning that you only have to win one out of three trades to break even. But if your winners are smaller than your losers (like risking $2 to make $1, a 2:1 risk-reward), you’d need a very high win rate (around 67%) just to keep your head above water.
To calculate the breakeven win rate, you can use the simple formula below:

Suppose that, on average, you risk $100 per trade and aim for a $200 profit. Your reward-to-risk ratio is 2 (since $200/$100 = 2). Plugging into the formula: Breakeven Win % = 1 / (1 + 2) = 0.333… = 33.3%. In practice, this means if roughly one in three trades is a winner (and the other two are losers) at that 1:2 risk-reward ratio, you will hit about break-even results. Traders find this super useful because it translates strategy metrics into a clear goal: we need to win at least X% of the time with our risk-reward profile. If our actual win rate is comfortably above that breakeven threshold, we have an edge; if it’s below, then over time, we’re likely to lose money.
Let’s put it in the context of options: If we usually trade credit spreads where we risk $500 to make a potential $500 (a 1:1 ratio). In that case, we need to win more than 50% of those trades to see a profit. But if we adjust the spread to risk $500 for a potential $1000 gain (1:2 ratio), now winning just 34% of the time could be enough to break even – any win rate higher than that and we’d be profitable. The breakeven ratio encourages us to consider both our strategy’s win probability and payout. It reminds us that even a modest win rate can be profitable if each win is significantly larger than each loss and vice versa.
2- Profit Factor

How do we measure overall trading performance in terms of dollars gained versus dollars lost? That’s where the profit factor comes in. The ratio answers a really simple question: for every dollar that we lose, how many dollars do we win? It’s calculated as total profits divided by total losses over a period of time. The profit factor sums up all your winning trades and all your losing trades, then compares the two. If the result is above 1.0, you’ve made more money than you lost; below 1.0 means you lost more than you made.
If, over the past month of options trading, we earned $10,000 from our winning trades and lost $5,000 from our losing trades. Our profit factor would be $10,000 / $5,000 = 2.0, as it shows that for every $1 we lost, we made $2 in profit—a very healthy outcome. A profit factor of 2.0 or higher is generally considered excellent, showing that the strategy generates $2 in profit for every $1 lost. On the other hand, if our total gains were $8,000 and total losses $8,000, the profit factor would be 1.0, meaning we’re at break-even (gaining one dollar for every dollar lost). Anything below 1.0 (say 0.8) would ring alarm bells, as it means we’re losing more money than we’re making in the long run.
The importance of profit factor is that it encapsulates both win rate and average win/loss size into one number. A trader could have a modest win rate but still a high profit factor if their winners far outweigh their losers. Conversely, someone might win many trades but with a low profit factor if a few large losses erase the gains. We often use profit factor to evaluate strategies or systems. For instance, if Strategy A has a profit factor of 1.5 and Strategy B is at 1.1, Strategy A has been more efficient at converting risk into reward (it made $1.50 for every $1 lost versus $1.10 for every $1 lost). We want to see this ratio comfortably above 1.0 – typically, a profit factor above ~1.5 is considered good, while anything below 1.0 indicates an unprofitable approach.
3- Win/Loss Ratio
The win/loss ratio, which is usually expressed as a win rate or win percentage, tells us how often we win relative to how often we lose. It’s basically the number of winning trades divided by the number of losing trades. If out of 10 options trades, we had 6 winners and 4 losers, our win/loss ratio is 6/4 = 1.5, and our win rate is 60%. This metric shows our consistency: how much are we on the right side of the trade?
There’s no doubt that traders love a high win rate—it feels so good to win. But when you’re only focusing on the win/loss ratio, you can be misled. The quality of wins matters as much as the quantity. It’s possible to win the majority of trades and still lose money if your losses are catastrophically large. Case in point: Trader X wins 90% of his trades, typically making $100 each time, but on the 10% of trades he loses, he loses $1000. After 10 trades, Trader X would win $900 (nine wins of $100) but lose $1000 on the one bad trade, netting out at –$100 despite a 90% win rate. Meanwhile, Trader Y might win only 50% of the time, making $300 on each win and losing $100 on each loss. After 10 trades (5 wins, 5 losses), Trader Y wins $1500 and loses $500, netting +$1000, with a far lower win rate.
The ideal scenario? To maintain a decent win rate with strong risk management. Many professional traders might win only ~50–60% of the time, but because they cut losses quickly and let winners run, they are consistently profitable. As the saying goes, “Don’t let a few large losses ruin an otherwise good win rate.” Some traders win 70% of their trades but end up losing money due to poor risk-reward discipline. The win/loss ratio should not be looked at in isolation. We should ask: What is our win rate, and what is the average win vs. average loss? A high win rate is great, but only if those wins meaningfully outweigh the losses.
4- Sharpe Ratio
When you are evaluating a trading strategy or investment, you shouldn’t only be looking at raw returns—you have to consider how much risk was taken to achieve those returns. The Sharpe ratio is a classic measure that helps us do exactly that! It tells us how much return we’re getting per unit of risk. Formally, it’s defined as the portfolio’s excess return (return above the risk-free rate) divided by the volatility of returns. In layman’s terms, it takes your average returns, subtracts a “safe” return (like what you’d get from a risk-free Treasury bill), and then divides by the standard deviation of your returns (a measure of how bumpy or risky those returns were).
The formula for the Sharpe ratio is often written as:

Rp is the portfolio’s average return, Ry is the risk-free rate, and Op is the standard deviation of the portfolio’s returns. Don’t panic if it looks technical—the main idea is that the Sharpe ratio measures return relative to variability. A higher Sharpe means you’re getting more return for each unit of risk (volatility) you endure. A lower Sharpe means you’re either getting low returns for the risk taken or experiencing high volatility for not much extra return. Traders and fund managers use it to compare strategies on an “apples to apples” risk-adjusted basis.
Let’s say that Strategy A and Strategy B both made 15% returns last year. But if Strategy A had wild swings (high volatility) while Strategy B was very steady, Sharpe will favor Strategy B. Let’s say the risk-free rate is near 0%. If Strategy A had a volatility of 15% and Strategy B had a volatility of 5%, then Sharpe_A = 0.15/0.15 = 1.0, while Sharpe_B = 0.15/0.05 = 3.0. Strategy B achieved the same return with only one-third the volatility, thus a much higher Sharpe. In practical terms, we, as options traders, might calculate Sharpe for our portfolio over the past year to see how smoothly (or bumpily) we earned our profits. A Sharpe ratio above 1 is generally considered good, meaning the returns were high relative to the risk. A Sharpe of 2 or 3 is excellent (common for very consistent strategies), whereas a Sharpe near 0 or negative is poor (indicating you’d have been much better off in cash).
5- Sortino Ratio
The Sortino ratio is a shirttail relative of the Sharpe ratio, but with one difference: it cares only about downside volatility. In other words, Sortino focuses on the bad volatility (returns below a certain threshold, usually the risk-free rate or 0%) and ignores the upside swings. The rationale is that volatility on the upside (big gains) isn’t a problem – we’re not worried about gains being too high! What we do care about is downside volatility – the size and frequency of losses or below-target returns. The Sortino ratio improves upon the Sharpe ratio by isolating downside volatility from total volatility, dividing the excess return by the downside deviation. This makes it a more refined tool when we want to penalize only harmful volatility.
The formula for Sortino ratio looks similar to Sharpe, but uses downside deviation in the denominator instead of standard deviation. Downside deviation is like a standard deviation calculated only on negative deviations (when returns fall below a chosen target or threshold). For example, if we use 0% as our target (i.e., consider any negative return as “downside”), we’d calculate the standard deviation of all negative monthly returns in our portfolio – that would be the downside deviation. Then:

What does this do? It gives us a better picture of risk-adjusted performance by not “punishing” a strategy for volatility on the upside. If an options strategy sometimes has huge winning months (which increase overall volatility), Sharpe would count that as more risk and lower the ratio, whereas Sortino would treat those large gains as a positive and not penalize the ratio for them.
If Strategy X and Strategy Y both average a 10% annual return above the risk-free rate. Strategy X is very steady most of the time but had a couple of -5% months (so some modest downside volatility). Strategy Y is also steady most of the time but had a few +10% months and a few -5% months—meaning that its overall volatility is higher because of big up moves, though the down moves are similar to X. Sharpe might rank Strategy X and Y differently due to Y’s higher total volatility. But Sortino would likely give them similar scores if their downside volatility (the -5% months) were similar. In fact, if Strategy Y’s volatility comes mostly from big positive jumps, Sortino could rate it higher than Sharpe does.
Here’s a practical example: Let’s say that we have two option strategies. One is a conservative covered call strategy that rarely loses much in a month, but also never makes more than say 3%. Another is a volatile long call strategy that often has small losses but occasionally hits a home run +20% month. Both might have the same average return. Sharpe might favor the steady covered calls, but Sortino might tell us the long call strategy isn’t as bad as Sharpe suggests, because its volatility is mostly upside. If the long call strategy’s losses are kept in check (no huge drawdowns), Sortino will show that by staying relatively high.
6- Return on Risk (ROR)

When you’re making an options trade, especially if you’re using strategies like credit spreads or short options, a question that comes up a lot is this: Given the money I have at risk in this trade, what return can I expect? Return on Risk (ROR) directly answers that! How? By measuring the profit of a trade relative to the amount of capital at risk. In essence, ROR = (Profit / Maximum Risk) × 100%. It’s like ROI (return on investment), but specifically framing the “investment” as the amount you could lose (the risk).
This metric is super handy for options traders because many options strategies have a clearly defined max risk. If we sell a credit spread, we know the maximum we could lose if things go wrong (minus the premium received), and we know the maximum profit (the premium we collected). Return on Risk tells us how much we stand to make relative to that worst-case risk.
Let’s say we sell an iron condor for a net credit of $3.00 on a $10-wide spread. This means our maximum risk on the position is $7.00 (we could lose $700 per contract if the trade goes completely bad since $10 – $3 = $7). If everything goes well, our max profit is $300 (the credit received). Now, if we decide to close the trade when we’ve made $175 of profit, what’s the return on risk? We made $175 on a $700 risk – that’s 25% ROR ($175/$700 = 0.25). Many traders set profit targets based on ROR: for instance, “I’ll take profits at 25% of my risk”. In this case, hitting a $175 profit on $700 risk meets that criterion.
ROR is also really useful for position sizing. If we have a target ROR in mind for each trade, we can decide how much risk to allocate accordingly. For example, some conservative traders might aim for trades that yield at least 10-15% ROR, while more aggressive ones look for 30% or higher per trade. However, it’s important to consider the probability of success along with ROR—sometimes, a really high ROR trade has a low probability of profit. And that’s why we have to balance risk-reward (ROR) with probability.
7- Maximum Drawdown Ratio
No trader’s equity curve goes straight up; we all experience drawdowns—periods where our account balance drops from a peak. The maximum drawdown (MDD) is the worst peak-to-trough decline our portfolio undergoes over a period. In simpler terms, it’s the biggest loss from a high point to a low point before a new high is achieved. We usually express this as a percentage. If our trading account grew from $10,000 to $20,000 (peak), then fell to $15,000 before rising again, that drop from $20k to $15k is a $5,000 decline or 25% drawdown. If $15,000 was the lowest point before the account recovered and hit new highs, then 25% is our maximum drawdown for that period.
Maximum drawdown is a critical risk metric because it shows the depth of a trader’s worst slump. It directly affects both our capital and our psychology. A shallow max drawdown (say 5-10%) is easy to recover from and won’t rattle us too much. But a deep drawdown (50% or more) can be devastating—not only do we need a huge subsequent gain to get back to even (a 50% loss requires a 100% gain to recover), but the psychological toll can cause traders to lose confidence or take irrational actions. MDD is an indicator of downside risk and capital preservation. Strategies with similar returns can have very different drawdowns; most investors would prefer the one with the smaller drawdown, as it implies a smoother ride and less risk of ruin.
Calculating maximum drawdown is pretty straightforward: scan through your equity curve (account value over time) and find the largest percentage drop from any peak to the subsequent trough. If we have daily or monthly account values, we identify every peak and then see how far it falls before recovering or hitting another peak. The largest of those drops is the MDD. If throughout the year, our account hit new highs of $50k, then pulled back to $40k at worst, recovered, later hit $60k, then pulled back to $48k at worst, and then went on to new highs. The drawdowns in those instances were $50k→$40k (20% drop) and $60k→$48k (20% drop). If those were the worst, our max drawdown is 20%. It’s possible to have multiple drawdowns of similar size; we care about the max.
Why is this ratio so important for traders? Because it encapsulates the concept of risk of ruin and the practical pain points in trading. A strategy with a 10% maximum drawdown gives us a lot of breathing room; one with a 60% max drawdown is walking on thin ice. Large drawdowns can be detrimental not just financially but emotionally— a lot of traders abandon strategies or make panic decisions during deep drawdowns. Keeping an eye on maximum drawdown forces us to respect the cardinal rule: preserve capital.
8- Risk of Ruin
Perhaps the most sobering ratio of all is the Risk of Ruin. This isn’t so much a ratio as a probability—the probability that a trader will lose so much capital that they basically go broke or can’t continue trading. In other words, it’s the chance of hitting a ruinous loss. Risk of ruin is the probability that an individual will lose substantial amounts of money via trading (or gambling) to the point where recovery is no longer possible. We obviously want this probability to be as close to zero as possible!
Several factors influence risk of ruin: win rate, payout ratio (average win vs average loss), and the fraction of capital risked per trade. If we risk too large a chunk of our account on each trade, even a statistically profitable strategy can have a high risk of ruin due to the volatility of results. For example, consider a trader with a 60% win rate where wins equal losses in size. If this trader bets half of their account on each trade, there’s a real chance that a streak of losses could wipe them out despite having an edge. By contrast, if the same trader risks only 1% of the account per trade, the risk of ruin is virtually zero (you’d need an implausibly long streak of 100+ losses to bust the account).
There are formulas and calculators to compute risk of ruin given certain assumptions. Without diving into heavy math, a general rule is: the higher your win probability and the smaller portion of your capital you risk each time, the lower your risk of ruin. Conversely, a low win rate or very high bet size makes risk of ruin skyrocket. To illustrate this trade-off, if you risk $5,000 per trade vs $1,000 per trade (with the same account size and strategy), your risk of ruin might jump from about 13% to virtually 0%. In one analysis, risking $5k per trade led to a 13% ruin probability, but dropping the risk to $1k made the risk of ruin a mere 0.0005%. That example highlights how dramatically position sizing can affect your survival odds. It’s the difference between likely surviving a long losing streak versus having a significant chance of tapping out.
For us options traders, risk of ruin is particularly relevant if we use leverage or trade highly volatile instruments. One reckless trade or one margin call can sometimes do irreversible damage. The concept encourages us to think in terms of worst-case scenarios. Even if something has a 1% chance of happening, if that 1% event would completely wipe you out, you need to plan as if it could happen. Managing risk of ruin usually means setting up strict rules: limit risk per trade (for example, risk no more than 2% of capital on any single trade), maintain an edge (positive expectancy), and avoid scenarios that could cause catastrophic loss (like not over-concentrating in one position or being short unlimited risk options without protection).
In practice, keeping the risk of ruin near zero means that we can weather losing streaks. It’s comforting to know that if we follow our risk management rules, even the worst-case drawdown should leave us with enough capital to come back and recover. Some traders fail not because their strategy couldn’t have been profitable but because they bet too big and hit a string of bad luck—they let their risk of ruin get too high, and probability caught up with them.
Tips for Applying Risk-Reward Ratios Effectively
Understanding these ratios is one thing. But applying them in our day-to-day trading? That’s a whole other ballgame! The following are some actionable tips that can help traders leverage risk-reward ratios for better results.
- Incorporate Ratios into Trade Planning: Before entering any options trade, calculate the key risk-reward metrics. What’s the risk-reward ratio of this trade? What’s the breakeven win rate? How does it affect our profit factor if it succeeds or fails? By doing this homework upfront, we ensure each trade meets our criteria (for example, only take trades with at least a 1:2 risk-reward or with expected Sharpe above a threshold). This habit prevents impulsive, poor-risk trades.
- Use Tools and Calculators: You don’t have to crunch all these numbers in your head—there are plenty of free trading calculators and software that can compute risk-reward ratios, profit factor, Sharpe/Sortino, etc. for you. Most broker platforms and portfolio tracking tools will show metrics like win rate and P/L ratios. For instance, you can use an online breakeven win rate calculator (inputting your stop loss and take profit) to see the win % needed instantly. And journaling software computes your profit factor and Sharpe ratio over time.
- Regularly Monitor Your Metrics: Make it a routine to review your risk-reward metrics periodically. It could be weekly, monthly, or after a set number of trades. Check your current win/loss ratio, profit factor, maximum drawdown, Sharpe, etc. Are they in line with your goals? If you notice, say, your profit factor dipping or your drawdowns increasing, it’s a prompt to investigate why. Maybe the market changed, or you deviated from your strategy. By catching these shifts early through metric monitoring, you can adjust your strategy or risk management before seemingly small issues turn into big problems.
- Adjust Position Sizing Based on Risk: Let the ratios guide how much to risk on each trade. If two setups have similar probabilities but one has a much higher return on risk, you might allocate a bit more to that one (still within your risk limits) because it offers more reward per risk taken. And if a strategy historically has a higher risk of ruin (maybe it’s super volatile), you’d decrease position sizes to compensate.
- Keep Psychology in Check Using Metrics: The numbers can also help with the mental game. When you know your strategy’s expected Sharpe or max drawdown, you’re way less likely to panic during a losing streak or get overconfident during a winning streak. If you’re in a drawdown but it’s still within historical norms (say your strategy often has 10% drawdowns, and you’re currently down 8%), you’ll be more confident sticking to the plan. If you didn’t know that, you might abandon a good strategy out of fear.
Start Trading Smarter: Leverage Risk-Reward Ratios
Knowing how to measure risk versus reward isn’t just useful—it’s one of the smartest ways to take control of your trading. All of the ratios we’ve covered give us a different way to evaluate your strategy, manage trades in the most effective way, and adjust based on real performance—not on instinct or a hunch!
Here’s a quick recap of what these 8 ratios can do for you:
- Risk-Reward Ratio: Helps evaluate trade setups by comparing potential reward to possible loss.
- Breakeven Ratio: This tells you how regularly your trades will need to succeed in order to be profitable.
- Profit Factor: Shows whether your strategy makes more than it loses over time.
- Win/Loss Ratio: Reveals how frequently you win compared to how often you lose.
- Sharpe Ratio: Measures return compared to total volatility.
- Sortino Ratio: Concentrates on downside risk to highlight the quality of returns.
- Return on Risk (ROR): Gauges the return you’re making relative to what you’re putting at stake.
- Maximum Drawdown Ratio: Helps you assess the real-world risks tied to your trading system.
You can make all of these work for your trading strategy! Track them, review them, and change up trades based on what they tell you. It won’t just sharpen your decisions; it’ll give you a much clearer view of what’s actually working and what you need to ditch.
And if you feel like you’re ready for some more advanced trading strategies, check out our useful educational tools and examples on OptionsTrading.org!